Blocking Needlepoint Using Wet Method
Before you block or get your needlepoint moist, you will want to make sure your threads can get wet. Most embroidery floss, overdyed thread and other threads can become wet but if you are not sure, please test the threads before you start the blocking process. Read how to test your threads for colorfastness. Many times, damage cannot be reversed! If you are not positive, use the steam method. Also, if the needlepoint is dirty, have it cleaned before blocking.
This method is great for wool threads.
A few tools are required for blocking. Of these you will need:
A blocking board
T-pins (Wig pins are not very strong)
White terry towel
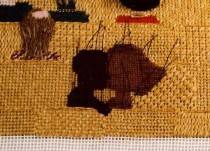
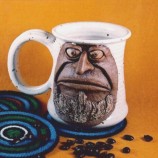
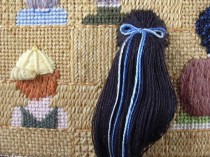 Hair and the beak of the hat are 3D
Depending upon the stitches you used to make the project, you will want to block the needlepoint either face up or down. If the stitches are 3D, you will want to block the project face up. If blocking a flat stitched item such as Basketweave chair seats, your best choice would be face down. You want your needlepoint as flat as possible
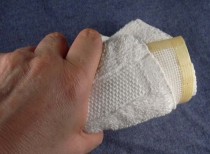
Immerse the entire project in a tub of cold water and gently remove the excess water. Roll the needlepoint in a white towel and give it a good squeeze.
A distorted canvas which is shaped as a parallelogram will need to be stretched it on the bias. Do not give this a hard tug. You just want to straighten it out a little.
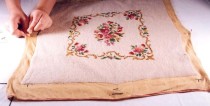
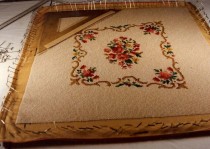
Begin with your blocking board and T-pins. In the middle of each side, pin the needlepoint on raw canvas to make the center of the motif taut.
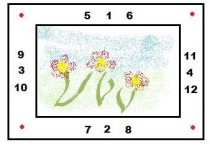
Then place eight pins, one on either side of each of the first, centered pins. (If you are misting, continue misting every 5 minutes and pinning as you go.
Continue pinning the needlepoint on the board until you have reached all four corners. These should be the last 4 pins. (Red dots on illustration)
Check your needlepoint to make sure it is square and all four sides are straight. You can use a 90 degree triangle or sheet of paper.
Sometimes the sides are square but the middle is not. If this is true, stick T-pins into the required areas to straighten the canvas. Place the pins straight up and down into the canvas, perpendicular to the blocking board. After 4 to 6 hours, remove the pins in the center. Keep the pins on the sides in place.
Leave the needlepoint and have a cup of espresso. Come back and see if the canvas is square. No, someone did not move your work. Your “brain” fixes it for your eyes and tricks you into thinking everything is straight. After a rest, your eyes will see straight again and you can correct the canvas as needed.
Let the needlepoint dry flat for at least 24 hours, so that the thread colors do not run down to one side. After this, you may want to stand the board on its side just to have it out of the way.
DO NOT dry your needlepoint in the sunlight. Sun rays can fade your threads. Also, after 24 hours, sometimes the canvas relaxes, and you have lumps or ridges. Don’t panic, just re-stretch as required.
When the needlepoint is completely dried, remove all the pins and finish as desired. Sometimes, the canvas is not square after blocking. When this happens, follow the blocking process again. Repeat as much as you need to. If you are framing, the steps are given on page Framing.
Cotton And Other Fibers

Mist the needlepoint as much as needed to dampen the fibers. You will not want to saturate the fibers or canvas. Mist like you would if you are ironing a shirt or skirt.
Block the same as above.
Helpful Hints For Blocking
1. Never block dirty needlepoint. Have it professionally cleaned if necessary.
2. When working on your project, make sure your hands are clean.
3. Keep food and drinks away from your work.
4. Small hands love to touch needlepoint. Again, be sure little hands are clean.
5. Keep children and pets away from delicate work.
6. Cover the canvas with a white cloth to keep dirt and dust from forming on it when you are not working on your project.
7. Park your needle out of the work area. A good tool to have is a needle minder.
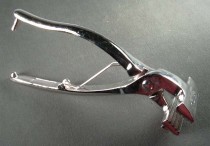
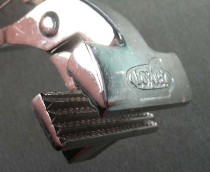
For large size canvases, you may wish to purchase a pair of canvas pliers. The large grooved teeth are great for gripping canvas and stretching. These are available at art supply stores.