
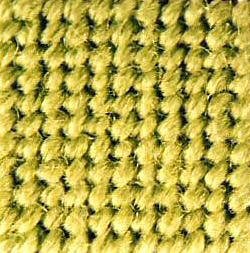
Basketweave Stitch

AKA: Bias Tent
Diagonal Tent
Uses: Good for all areas except for very small areas. Consider Continental

Begin with a waste knot. Start in the upper left hand corner. Come out at 1 and down in 2, continuing to work 3 and 4. (Yellow stitches in graph) Stitch until you have reached the bottom right-hand corner. Have you noticed your needle pointing down when stitching? Sink your needle to the underside of the canvas when you have reached the end of the row. For an up row, follow the numbers on the right in the illustration. Like the first row, come up at 1 and down at 2 until you have reached the end of the row. (Orange stitches on graph) Your needle should be pointing to the left each time you take a stitch. When you reach the top again, repeat row one.
Rules for lovely Basketweave
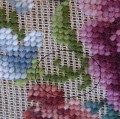
 Back Side Of Basketweave
The back of Basketweave should have a woven pattern. You will not want to break up this pattern. When you finish a thread, start stitching in the exact spot where you ended. You will want to continue in the same direction as you left off. Also, anchor your thread by running your needle under the threads either horizontally or vertically to the sides of your canvas. Never anchor the thread diagonally. This will create a line in the stitching that will not block out.
Also, never stitch 2 up rows or 2 down rows together. This will break up the Basketweave pattern and again, a line will appear in the stitches.
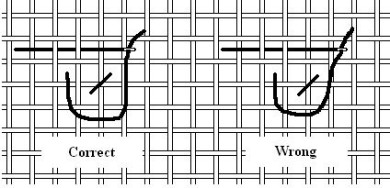
On mono canvas, the intersections have one thread on top of the other. (See illustration) When you stitch a down row, be sure the vertical canvas thread (pole) is on top. For an up row, the horizontal (step) thread is on top. Look at the illustrations and you will see up and down rows worked. A good rule to remember is: stitch up the steps and down the poles.

When working Basketweave, if you cannot decide whether the next row should move up or down, remember the needle should be pointing vertically for down rows and horizontally for up rows. When you can not determine which way your row should travel, stitch a row. If the underside is moving in the same direction, rip it out and create a row in the opposite direction. Never make two down or two up rows next to one another. The line it creates will never block out.
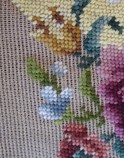
When Embellishing the background in Basketweave, make each row as long as possible.
Always start and finish your yarn by weaving on the underside in either horizontal or vertical direction. Never weave it in a diagonal direction.
If you have only 1 stitch to jump over, travel over this area. If the pre-worked rows have created a peninsula, do not travel over this area but fill in with a different strand of background thread.

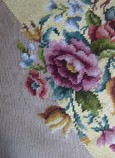
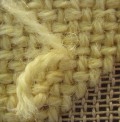
Sometimes, the person who stitched the center motif has created a “lump” of yarn on the canvas. It is best to avoid creating a heavier pile by not carrying threads or yarns over the lump. Try to stitch around the area. Be creative in starting and ending your threads. Remember, work around the lump.
Always start and end your thread with the tail traveling either horizontal or vertical.
You do not need long tails for anchoring. Only 2 or 3 secure stitches are required. Once the canvas has been blocked, the stitches are locked into place. This is particularly true when working with wool threads.

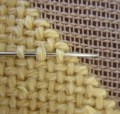
To omit confusion, start stitching next to the pre-worked motif or previously worked background stitches. This is important. On Penelope canvas, it is easy to get confused. Be sure you are working with the correct 4 small intersections for the correct canvas count.
Fill in small voids with a different strand of background thread. You want the back of the canvas as smooth and flat as the front. Lumps and bulges will show on the top side once the canvas has been finished. This is also true with pillows.
This stitch count is accepted for Master Craftsman for Canvas Embroidery by The Embroiderers' Guild of America.


